Welcome to our guide on understanding why fence posts often rot at ground level and how you can prevent it from happening. If you’ve ever dealt with a leaning or broken fence post, you know how frustrating it can be to see the damage where the wood meets the ground. This is a common issue that affects many homeowners, but the good news is that by learning the causes and taking a few preventative steps, you can save yourself time, money, and the hassle of frequent repairs. In this article, we’ll dive into the reasons behind this problem, offer practical solutions, and share expert tips on how to keep your fence standing strong for years to come.
Fence posts rot at ground level primarily due to constant exposure to moisture and oxygen, creating the ideal environment for wood decay. The area where the post meets the soil is especially vulnerable because water tends to accumulate there, often exacerbated by poor drainage or wet soil conditions. Choosing pressure-treated wood, installing proper drainage solutions, and regularly maintaining the posts can help prevent rot and extend the life of your fence.
Table of Contents
Understanding The Problem: Why Do Fence Posts Rot At Ground Level?
Fence post rot is a common issue for homeowners, but understanding why this happens can help you take preventative measures and maintain the longevity of your fence. The area where the post meets the ground is particularly vulnerable, and there are several reasons for this.
Explanation of Rot and Decay
Wood rot is a natural process that occurs when wood is exposed to moisture and oxygen for extended periods. These two factors are the key ingredients that promote the growth of fungi, which break down the organic structure of the wood, leading to rot.
How does this apply to fence posts?
The portion of the post that’s in contact with the ground is the most susceptible to decay. When you install a fence, the post goes into the soil, which can hold moisture and oxygen—perfect conditions for wood rot. Over time, even pressure-treated wood can begin to break down if not properly protected. This ground-level zone is where moisture from rain, irrigation, and natural condensation collects, making it the most vulnerable spot on the fence post.
Different Types of Rot
There are two primary types of rot that affect wood: wet rot and dry rot. Both are caused by different factors, but they can equally damage fence posts if left untreated.
1. Wet Rot
Wet rot occurs when wood is in constant contact with moisture. As water saturates the wood, the fibers become soft and start to deteriorate. This type of rot is common in climates with frequent rainfall or poor drainage, as the wood never has a chance to dry out. You’ll notice wet rot through discoloration, cracking, and a spongy texture on the affected areas. Wet rot doesn’t usually spread beyond the moist areas, but it weakens the wood’s structure significantly.
2. Dry Rot
Dry rot is driven by fungi and can occur even when the wood appears dry on the surface. This type of rot typically starts when the wood was previously exposed to moisture, creating an environment where fungi can thrive. Once the fungi infiltrate the wood, they can cause decay even after the wood dries out. Dry rot is particularly dangerous because it can spread quickly and compromise the structural integrity of the post, leading to breakage or collapse.
Environmental Factors That Contribute to Fence Post Rot
The environment around your fence posts plays a crucial role in how quickly they rot. Moisture is the number one culprit, but other factors can make the situation worse:
Moist Soil
Soil with poor drainage retains moisture, which keeps the wood wet for extended periods. This is especially true for clay soils, which hold onto water much longer than sandy soils. The constant presence of water in the soil increases the likelihood of wet rot forming at ground level.
Heavy Rainfall
If you live in an area with frequent rain, the moisture levels around your fence posts will naturally be higher. Combined with poor drainage, the posts may never fully dry out, leading to accelerated rot.
Poor Drainage
When water pools around your fence posts because of improper grading or drainage, it can lead to long-term exposure to moisture. Proper drainage systems or gravel at the base of the posts can help water flow away and reduce the risk of rot.
Climate Considerations
Certain climates are naturally more prone to fence post rot. For instance, if you live in a humid or coastal area, the moisture in the air can contribute to the rot problem. On the other hand, in drier climates, you may still face rot due to irrigation systems or seasonal rains, but the overall risk is lower.
Fence post rot at ground level is primarily caused by a combination of moisture and oxygen exposure. Understanding the types of rot—wet and dry—can help you identify early warning signs and take action to prevent further decay. Environmental factors such as soil type, rainfall, and drainage all contribute to how quickly rot occurs. By addressing these factors, you can prolong the life of your fence and avoid costly repairs down the road.

Common Causes Of Fence Post Rot At Ground Level
Fence post rot is one of the most common issues that homeowners face when it comes to maintaining their outdoor structures. Understanding the root causes of rot can help prevent the need for costly repairs or replacements down the line. Below, we’ll explore some of the most common factors that contribute to fence post rot at ground level.
1. Moisture Accumulation
Moisture is one of the biggest culprits behind fence post rot, especially at ground level. When water accumulates around the base of the post, it creates a breeding ground for decay.
- Water Accumulation: In areas with poor drainage, rainwater tends to gather around the base of fence posts. Over time, this consistent exposure to moisture weakens the wood, making it more susceptible to rot.
- Sprinklers and Condensation: Beyond rain, sprinkler systems can add to the problem by consistently soaking the ground around the fence. Even condensation, especially in humid environments, can elevate moisture levels, contributing to faster degradation of the wood.
- Solution: To combat moisture accumulation, consider installing drainage systems or placing gravel at the base of each post to help water flow away, reducing the risk of prolonged water exposure.
2. Soil Type and Drainage Issues
The type of soil around your fence plays a critical role in determining how much water the wood will be exposed to. Certain soil types, such as those that are clay-heavy, tend to retain water for longer periods, which can lead to increased moisture exposure.
- Clay-Heavy Soils: Clay soils are notorious for holding onto water. When clay surrounds your fence posts, it slows down the drying process after rain or irrigation, keeping the wood damp for extended periods. This moisture retention accelerates the rotting process.
- Improper Drainage: If the ground is not sloped properly, water may pool around the posts instead of draining away. Additionally, a lack of drainage systems exacerbates this issue, leading to standing water that eats away at the wood.
- Solution: Using well-draining materials like gravel or sand around posts and ensuring proper slope away from the fence can drastically reduce the risks associated with poor drainage.
3. Wood Quality and Treatment
The quality of the wood you use for your fence posts and whether it’s treated or untreated can significantly affect how prone it is to rotting.
- Untreated Wood: Untreated wood is highly vulnerable to rot as it lacks any protective barrier against moisture. This makes it more susceptible to damage from both water and pests, accelerating decay.
- Treated Wood: Pressure-treated wood offers a higher level of resistance to decay because it’s infused with chemicals that help protect against moisture and insect damage. However, even treated wood isn’t completely immune. Over time, especially if installed improperly or exposed to persistent moisture, even treated wood can rot.
- Solution: Opt for pressure-treated wood to maximize the longevity of your fence posts. Additionally, applying sealant or wood preservative regularly can provide an extra layer of protection against moisture.
4. Poor Installation Practices
Improper installation is another common cause of fence post rot. Even the best-quality wood will rot prematurely if installed incorrectly.
- Setting Posts Too Deep or Too Shallow: Posts that are set too deep can be surrounded by too much moisture, while posts that are too shallow may lack the stability needed to stay upright and can absorb moisture more easily.
- Lack of a Barrier Between Wood and Soil: When wood is placed directly in the soil without a protective barrier, it absorbs moisture from the ground more readily. This accelerates the rotting process, especially at the ground level where water tends to accumulate.
- Improper Materials: Using untreated wood or incorrect fasteners can contribute to faster deterioration.
- Solution: When installing fence posts, ensure that they are set at the correct depth (usually 1/3 of the post’s length) and use a gravel or concrete base to create a moisture barrier. Wrapping the bottom of the posts with a protective material like tar or a waterproof membrane can also prevent moisture from seeping in.
5. Lack of Maintenance
Regular maintenance is essential in extending the life of your fence posts. Failing to properly maintain your fence is one of the most preventable causes of rot.
- Not Sealing or Treating Posts: Over time, the protective treatments applied to fence posts wear off due to weather exposure. If posts aren’t re-sealed or treated periodically, they become more vulnerable to moisture penetration.
- Neglecting Inspections: Regularly inspecting your fence posts for signs of decay, such as discoloration, soft spots, or visible cracks, can help you catch problems early before they lead to significant damage.
- Solution: Make it a habit to inspect your fence at least once a year, especially after harsh weather conditions. Apply wood preservative or sealant to treated and untreated wood to keep moisture at bay. Promptly address any signs of decay to prevent the issue from spreading.
Preventing fence post rot requires attention to both installation practices and ongoing maintenance. By understanding the common causes of rot — from moisture accumulation and soil type to wood quality and maintenance neglect — you can take proactive steps to protect your fence and extend its lifespan. Regular inspections, proper drainage solutions, and the use of high-quality, treated wood are all key strategies in preventing costly repairs and replacements.
How To Prevent Fence Posts From Rotting At Ground Level
When installing a fence, one of the most common issues that can compromise its longevity is rot at ground level, particularly for wood posts. This section will cover effective strategies to help prevent fence posts from rotting at the base. From selecting the right materials to ongoing maintenance, proper installation techniques, and retrofitting solutions, following these steps will ensure your fence remains sturdy and durable for years to come.
1. Choosing the Right Materials
Pressure-Treated Wood
Choosing pressure-treated wood for your fence posts is one of the most effective ways to combat rot. Pressure-treated wood is infused with preservatives that help protect it from moisture, insects, and fungal decay, making it far more durable than untreated wood. If you are using wooden posts, pressure-treated options are highly recommended because they are specifically designed to withstand exposure to the elements. Untreated wood, by comparison, is highly susceptible to rot when exposed to moisture at ground level.
Alternative Materials
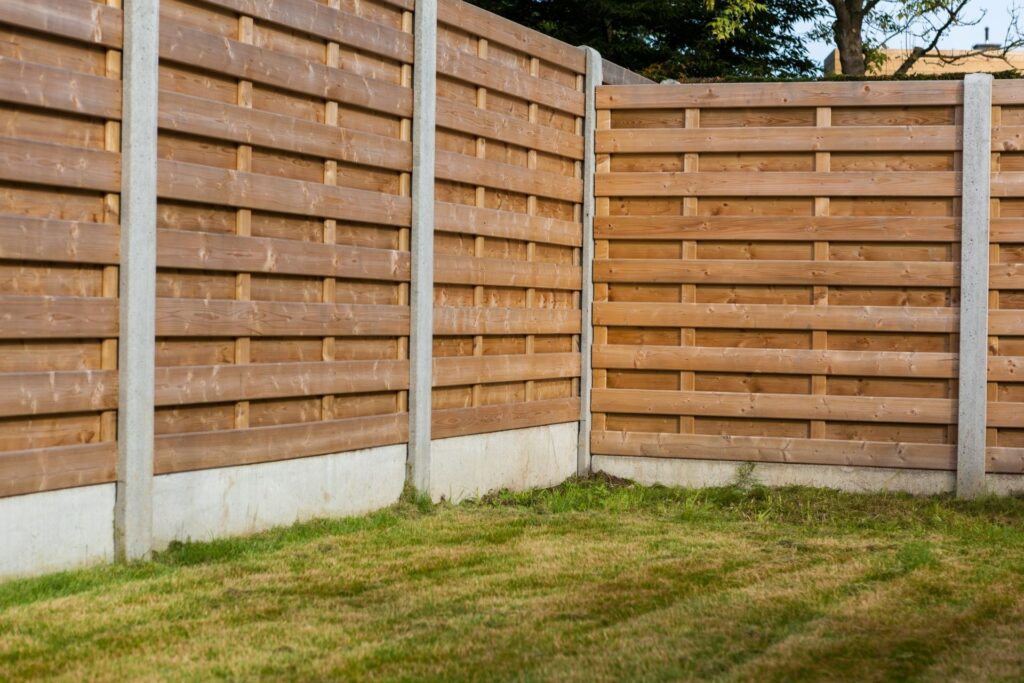
For those looking for even more durability and minimal maintenance, using alternative materials such as metal or concrete can be a great option. Metal posts, particularly galvanized steel, are resistant to rust and won’t decay like wood. Similarly, concrete posts provide a permanent solution, as they won’t rot and can withstand the harshest outdoor conditions. While these options may have a higher upfront cost, they eliminate the risk of rot altogether, offering a longer lifespan for your fence.
2. Installation Best Practices
Gravel for Drainage
Proper installation plays a crucial role in preventing rot. A key tip is to place gravel at the bottom of the post hole before setting the post. Gravel promotes drainage by preventing water from pooling around the base of the post. This drainage reduces the moisture exposure that leads to rot, giving your fence posts a better chance of standing strong over time.
Use of Post Sleeves or Caps
Another effective method to protect wood posts is by using post sleeves or caps. Post sleeves are typically made of plastic or metal and act as a barrier between the wood and the soil, preventing direct contact with moisture. Post caps protect the top of the posts from rainfall, preventing water from seeping into the wood fibers. These affordable additions can significantly prolong the life of your fence posts.
Concrete Footings
Concrete can be an excellent choice for setting fence posts, but improper installation can lead to trapped moisture, increasing the risk of rot. When using concrete, make sure the concrete footing slopes away from the post to direct water away. It’s also beneficial to leave the top of the post slightly above ground level to avoid direct contact with wet soil. Some people add a layer of gravel under the post before pouring concrete to improve drainage.
Above-Ground Installation
If possible, consider slightly raising the fence posts above ground level. This keeps them out of direct contact with the soil, further reducing moisture exposure. Another technique is to shape the top of the concrete footing into a dome shape, ensuring water flows away from the post rather than pooling around it.
3. Regular Maintenance Tips
Sealing and Staining
Even pressure-treated wood can benefit from additional protection. Applying a high-quality sealant or stain helps create a waterproof barrier that protects the wood from moisture. Reapply this protection every couple of years to keep your posts in good condition. Stains with UV inhibitors also help prevent sun damage, which can weaken the wood over time.
Inspections
Regularly inspecting your fence is a simple but effective way to catch early signs of rot or damage. Look for any discoloration, soft spots, or cracks in the wood that indicate rot is beginning. If caught early, you can often treat or replace affected areas before the rot spreads and compromises the entire post.
Clear Vegetation Around Posts
Another overlooked maintenance tip is to clear any overgrown vegetation near the base of the posts. Plants and tall grass can trap moisture, increasing the likelihood of rot. Ensure the area around your fence posts stays dry by trimming back plants and maintaining good airflow.
4. Retrofitting Existing Posts
If your existing fence posts are showing signs of wear or you want to protect them from future rot, there are several retrofitting techniques you can apply.
- Protective Barriers: Consider installing a barrier, like a post sleeve, around your existing posts. This keeps the soil and moisture from coming into direct contact with the wood.
- New Sealant: Reapply a sealant or waterproofing treatment to any exposed areas of the wood. This helps prevent moisture from seeping into the posts and causing further damage.
- Drainage Solutions: If poor drainage is an issue, you can add gravel around the base of the posts or dig trenches to divert water away from the fence. Improving drainage around existing posts can make a significant difference in preventing rot.
By following these best practices, you can prevent fence posts from rotting at ground level, ensuring your fence remains strong and stable for years to come. Whether you’re installing new posts or retrofitting existing ones, these strategies will help maintain the integrity of your fence, saving you time and money in the long run.
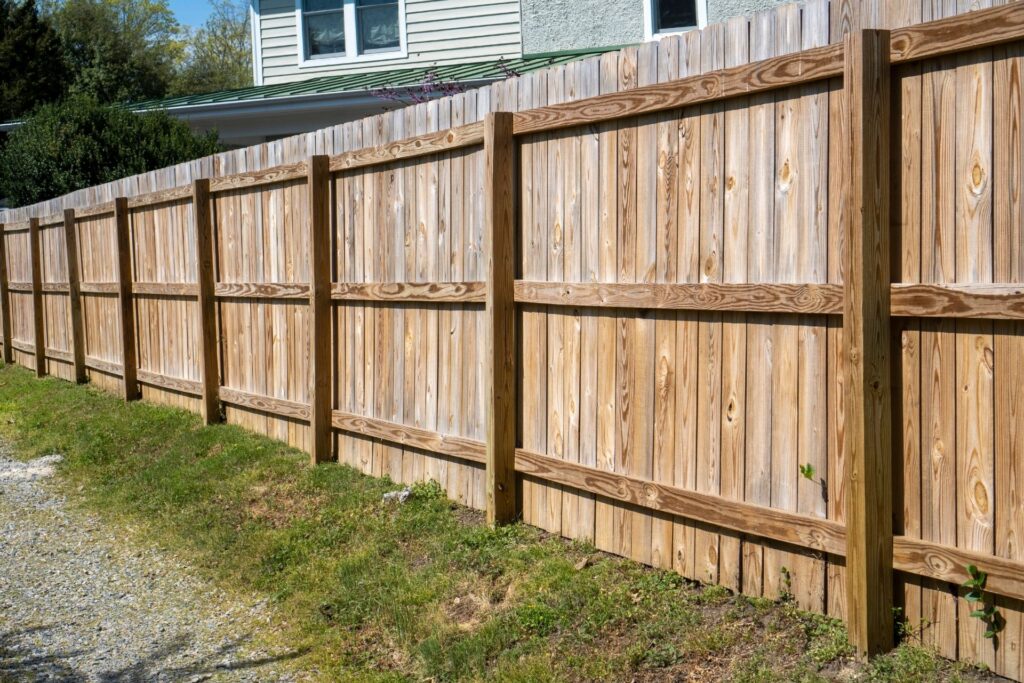
Signs Your Fence Post Is Rotting
Your fence is an important part of your property, providing security, privacy, and aesthetic appeal. However, like any outdoor structure, it is vulnerable to natural wear and tear over time, with rot being a common issue. Identifying the early signs of fence post rot is crucial to avoid costly repairs down the road. Let’s take a closer look at the signs of rot and the steps you should take to address the problem.
Common Signs of Rot
Rot is a natural decay process caused by moisture, fungi, and the elements breaking down wood fibers. When it comes to fence posts, the section of wood that is most vulnerable is where the post meets the ground. Here’s how to tell if your fence post is starting to rot:
- Discoloration or Darkening at Ground Level: One of the earliest and most visible signs of rot is a change in the wood’s color. If the wood around the base of your post appears darker than the rest, it’s often a sign of moisture damage, which can lead to rot.
- Soft or Spongy Wood: If the wood feels soft or spongy when pressed, this is a clear indicator that the post is beginning to break down. Healthy wood should feel firm to the touch, while rotting wood will give way under pressure.
- Cracks, Splits, or Structural Weakness: As rot progresses, it weakens the integrity of the wood. This can lead to cracks or splits, and in some cases, the post may become wobbly or unstable. You might notice that the post is leaning or feels loose when you apply pressure.
- Visible Fungus Growth: Rot often goes hand-in-hand with fungal growth. If you spot mushrooms, mold, or other fungi growing at the base of the post, it’s a clear sign that moisture has taken hold, and the wood is decaying.
What to Do if You Detect Rot
If you’ve noticed any of these signs, it’s important to act quickly to prevent further damage. Depending on the severity of the rot, there are different ways to handle the situation.
Minor Rot: How to Treat and Seal Small Areas of Rot
If the rot is limited to a small section of the post, particularly above the ground, it may be possible to treat the area without replacing the entire post. Here’s what you can do:
1. Dry the Affected Area: Begin by thoroughly drying out the affected wood. Moisture accelerates the decay process, so it’s important to ensure the wood is completely dry before proceeding with any treatment.
2. Remove Rotted Wood: Use a chisel or a wire brush to scrape away any soft, rotting material. The goal is to expose the solid, healthy wood underneath.
3. Apply a Wood Preservative: Once the decayed wood is removed, apply a high-quality wood preservative to prevent further rot. This treatment will help repel moisture and protect the post from future fungal growth.
4. Seal the Wood: After treating the wood with a preservative, apply a sealant to provide an additional layer of protection. A waterproof sealant will help block out moisture and slow down the progression of rot.
Severe Rot: When to Replace a Post Entirely
If the rot has affected a significant portion of the post, particularly at the ground level, or if the post is loose and unstable, it’s best to replace it entirely. Here’s how to replace a rotting fence post properly:
1. Remove the Old Post: Start by digging around the base of the rotting post to loosen it from the ground. If the post is set in concrete, you may need to break up the concrete and remove it along with the post.
2. Choose a Treated or Rot-Resistant Wood: When selecting a replacement post, opt for pressure-treated wood or naturally rot-resistant options like cedar or redwood. These materials are specifically designed to withstand outdoor conditions and resist moisture.
3. Install the New Post: Before installing the new post, treat the bottom of it with wood preservative, especially if you’re setting it directly in the soil. This extra step can significantly extend the life of the post.
4. Consider Concrete or Gravel: To further prevent future rot, consider setting the post in gravel instead of directly in the soil, or use concrete to create a more stable and moisture-resistant base.
5. Regular Maintenance: After installation, regular maintenance is key to ensuring the longevity of your fence. Routinely inspect posts for signs of wear, apply wood preservative as needed, and ensure proper drainage around the posts to prevent moisture buildup.
Fence post rot is a common but manageable issue. By identifying the signs early and taking prompt action, you can extend the life of your fence and avoid expensive repairs. Whether it’s treating minor rot or replacing a severely damaged post, staying on top of maintenance will ensure your fence remains sturdy and secure for years to come.
In summary, always keep an eye out for discoloration, soft wood, cracks, and fungal growth. These early warning signs will help you catch rot before it causes serious damage. When in doubt, replacing a post may be the best solution for long-term durability and peace of mind.
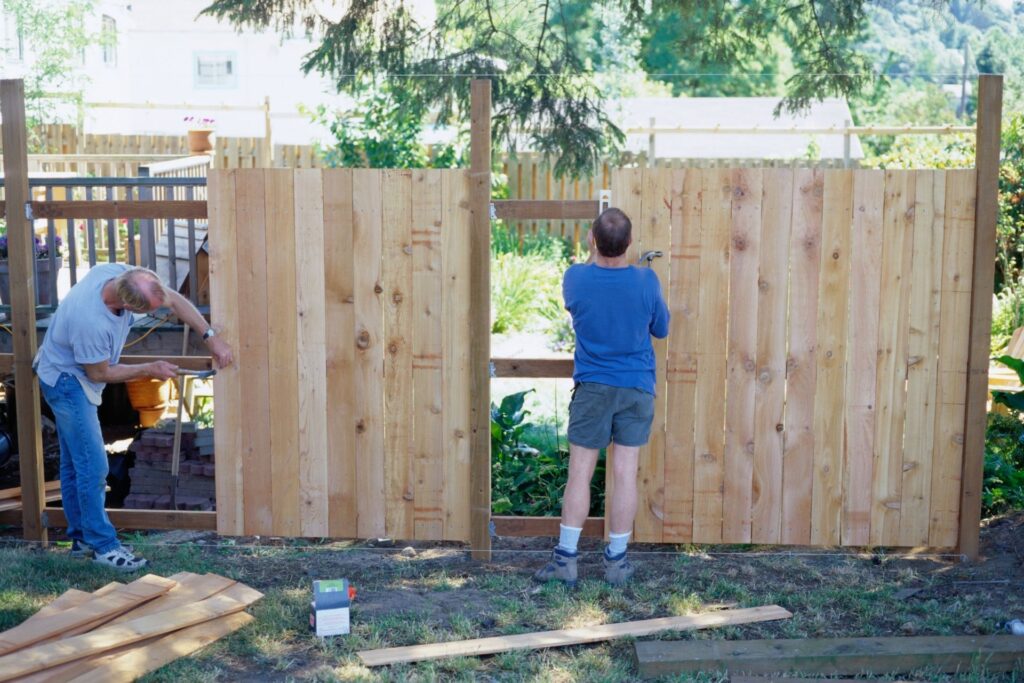
When To Call A Professional
Knowing when to tackle a home repair project yourself and when to call in a professional is a critical decision for any homeowner. While the DIY route can be tempting due to cost savings, not every job should be handled without the expertise of a seasoned professional. Here’s a breakdown to help you understand when it’s best to reach out for professional help, and the benefits it brings.
DIY vs. Professional Help
As a homeowner, it’s important to assess whether a project is within your capabilities or requires expert intervention. Simple tasks, such as minor caulking or small patch jobs, can often be handled on your own if you have the right tools and a bit of know-how. DIY can be a satisfying and budget-friendly way to handle small repairs or aesthetic improvements, but when you’re dealing with significant damage—like deep-rooted wood rot, structural issues, or moisture problems—it’s usually time to call a professional.
For instance, if you notice signs of rot on critical parts of your home like the foundation, support beams, or roof, it’s not something to take lightly. These types of problems can compromise the structural integrity of your home, leading to costly repairs down the road if not addressed properly. Professionals not only have the specialized tools but also the experience to diagnose the severity of the problem and provide a solution that ensures long-term safety and durability.
In some cases, attempting to fix these issues on your own could make things worse, resulting in more expensive repairs later. This is especially true for tasks that require expertise in local building codes, safety standards, and proper material handling—things a DIYer might overlook.
Benefits of Hiring a Professional
Hiring a professional brings a variety of benefits, especially when the job demands precision and long-lasting results. Professionals are trained to recognize the root cause of problems, not just the symptoms. For example, if you’re dealing with rot, an expert can determine if it’s due to poor ventilation, water damage, or a deeper structural issue that a DIY repair might miss entirely.
One of the key advantages of hiring a professional is the quality and durability of the work. Experts are equipped with the knowledge to ensure proper installation and use materials that are resistant to future damage, like moisture and rot. This kind of expertise offers peace of mind that the problem won’t resurface shortly after the repair, saving you from repeated fixes and further frustration.
Another benefit is the time and effort saved. Tackling a repair yourself can be time-consuming, especially if you’re unfamiliar with the process or encounter unexpected issues. Professionals work efficiently and often have access to higher-quality materials and tools that aren’t readily available to the average homeowner.
Additionally, professionals can offer warranties on their work, providing an extra layer of protection for your home. Should anything go wrong after the repair, you’re covered. This is especially valuable for larger projects where long-term performance and safety are key concerns.
In conclusion, while DIY repairs are great for minor issues or aesthetic tweaks, hiring a professional ensures that major repairs are handled with the care and expertise they demand. This not only protects your home from future damage but also preserves its value and safety for the long haul.
FAQs: About Why Do Fence Posts Rot At Ground Level
Why do fence posts rot at ground level?
Fence posts rot at ground level because that’s where moisture and oxygen levels are highest. When wood is exposed to constant moisture, especially where it meets the soil, it creates the perfect environment for rot to occur. Poor drainage, water accumulation, and untreated wood are common factors that contribute to this problem.
What are the different types of rot that affect fence posts?
There are two main types of wood rot: wet rot and dry rot. Wet rot occurs when wood is continuously exposed to moisture, causing the wood fibers to break down. Dry rot, caused by a fungus, occurs even when wood appears dry but has had prior exposure to moisture, allowing the fungus to spread and weaken the wood.
What role does soil type play in fence post rot?
Soil type plays a significant role in how much moisture your fence posts are exposed to. Clay-heavy soils retain water longer, which increases moisture around the post. Poorly draining soils also contribute to water accumulation, which accelerates rot. In contrast, well-draining soils reduce moisture exposure, helping to prevent rot.
How can I prevent my fence posts from rotting?
To prevent fence posts from rotting, you can use pressure-treated wood, install gravel or other drainage materials at the base of the post, and seal or stain the wood regularly to protect it from moisture. Additionally, proper installation practices, such as raising the post slightly above ground or using post sleeves, can help protect the post from direct soil contact.
What is the best material to use for fence posts to avoid rot?
Pressure-treated wood is one of the best materials for fence posts because it has been chemically treated to resist rot. However, alternative materials like metal or concrete posts are also excellent choices if you’re looking for a solution that won’t rot at all.
How can poor installation lead to fence post rot?
Poor installation, such as setting posts too deep or directly in the soil without proper drainage, can trap moisture around the post. Using concrete improperly (not sloping it away from the post) or failing to add gravel for drainage can cause water to pool at the base, accelerating rot. Proper installation ensures moisture moves away from the post base, reducing the risk of rot.
How often should I maintain or inspect my fence posts to prevent rot?
It’s recommended to inspect your fence posts at least once a year, especially after the rainy season. Look for early signs of rot such as discoloration, softness, or cracks at ground level. Applying a sealant or wood preservative every 1-2 years can also help protect the posts from moisture.
Can I fix a fence post that has already started to rot?
If the rot is minor and caught early, you can treat the affected area by removing the rotten section, applying wood preservative, and sealing it. However, if the rot is severe or has compromised the structural integrity of the post, it’s best to replace the post entirely to avoid further damage.
Are there ways to retrofit existing fence posts to protect them from rot?
Yes, you can retrofit existing fence posts by adding post sleeves or post caps to protect the base from direct contact with the soil. You can also add gravel or crushed stone around the base to improve drainage, or apply a new coat of wood sealant to help repel moisture.
When should I consider hiring a professional to address fence post rot?
If the rot is extensive, affecting multiple posts, or if the structural integrity of the fence is compromised, it’s a good idea to hire a professional. They can replace rotted posts, install proper drainage solutions, and ensure the fence is installed correctly to prevent future rot issues.
Conclusion
In conclusion, understanding and preventing ground-level rot in fence posts is crucial for maintaining a strong, long-lasting fence. Investing in proper installation and regular maintenance can prevent costly repairs or replacements down the road, saving both time and money. By following these preventive steps, you’ll protect your fence and keep it looking great for years to come. If you have additional tips or personal experiences, we’d love to hear them in the comments! Don’t forget to check out our related posts on fence care and DIY tips for backyard maintenance.
About the Author:
Mike Veail is a recognized digital marketing expert with over 6 years of experience in helping tradespeople and small businesses thrive online. A former quantity surveyor, Mike combines deep industry knowledge with hands-on expertise in SEO and Google Ads. His marketing strategies are tailored to the specific needs of the trades sector, helping businesses increase visibility and generate more leads through proven, ethical methods.
Mike has successfully partnered with numerous companies, establishing a track record of delivering measurable results. His work has been featured across various platforms that showcase his expertise in lead generation and online marketing for the trades sector.
Learn more about Mike's experience and services at https://theleadguy.online or follow him on social media:

